5 Yoga Poses to Help Relieve Lower Back Pain
Sport & Activity
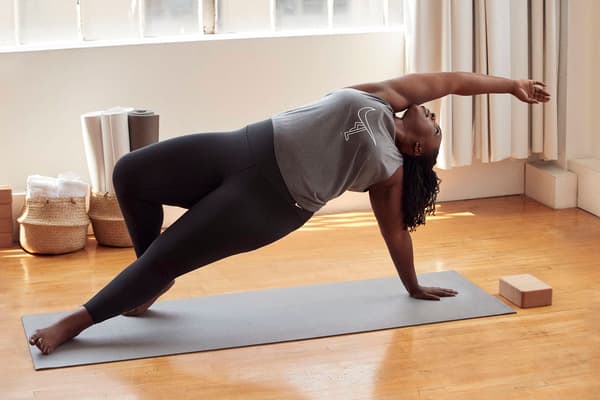
Some yoga poses are better than others when it comes to relieving lower back pain. Try these five on for size.

If you struggle with back pain, you're not alone. Researchers estimate that 65 million Americans have reported a recent episode of back pain and about 16 million adults in the US report persistent or chronic back pain that limits some everyday activities. Lower-back pain is the fifth most common reason for all doctor visits in the United States.
Back pain can be all-consuming as the muscles in the back are involved in so many typical daily movements. Unfortunately, participation in physical activity doesn't necessarily protect you. Researchers don't know if athletes get back pain more often than the general population, but they conclude that it is a 'common source of pain in athletes'.
Standard back pain treatments include physiotherapy, heating pads, cooling sprays and pain medication. Studies have also shown that using yoga for back pain can also be effective.
How to Know If a Pose Is Good for Back Pain
Some poses are better than others when considering yoga for lower back pain. Dr Rahul Shah, an American Board of Orthopaedic Surgery-certified orthopaedic spine and neck surgeon, suggests that you choose yoga poses that help increase hip flexibility and improve core stability. He says that the goal is to 'prime' the muscles so that the head is held effortlessly over the pelvis in all planes of motion.
These poses, or asanas, help improve mobility and relax the muscles in the back and hip area to provide relief. But always use pain as your guide. If a posture aggravates your condition, skip it. And if your back pain becomes chronic, check with your healthcare provider to get personalised advice regarding the best treatment for you.
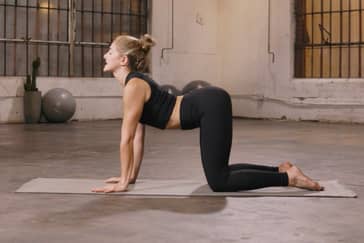
1. Cat Cow (Marjaryasana/Bitilasana)
This pose helps to relieve tension through the entire spine, from the upper back, through the middle and lower back and even down to the tailbone and into the hips. Doing the cat-cow pose also helps increase postural awareness, to help you stand taller throughout the day.
How to: Start in a tabletop position with your hands and knees on your mat. Make sure that your hands are directly beneath your shoulders, and knees beneath your hips. The tops of your feet should lay flat on the mat so that your feet are completely relaxed. Everything from the top of your head down to your tailbone should align properly in one straight line. Now inhale as you move into cow pose. Drop your belly towards the floor as you simultaneously lift the crown of your head and the tip of your tailbone towards the sky. Keep the spine long. Then exhale and move into cat pose. Pull your belly button up towards your spine and curve your back into a C shape. Continue to move within your range of motion between cat and cow.
Pro tip: Keep your shoulders relaxed and away from your ears as you move through this pose. As you move into cow pose, the chin drops down but never directly touches the chest.
2. Downward-Facing Dog (Adho Mukha Svanasana)
Also called 'down dog' or 'downward dog', this mild inversion pose helps to strengthen the upper body while stretching the lower back and hamstrings. Bear in mind that inversions can be problematic for those with upper-body joint issues. If down dog causes joint pain, skip it and move onto a different yoga pose for back pain.
How to: Begin in a tabletop position. Spread your fingers wide and press through your hands as you exhale, tuck your toes under and lift your knees off your mat. Start to straighten your legs and bring your body into an inverted V shape. Think about reaching your hips to the sky while pressing your heels towards the mat. Your arms and legs should reach towards a straight position but should not feel locked out.
Pro tip: Weight should be evenly distributed between your feet and your hands. Your entire hand should be engaged so that it feels like you are pressing through your palms and through each of your fingers.
3. Supine Spinal Twist (Supta Matsyendrasana)
This supine twist pose is often done at the end of a yoga practice, but it can be done throughout the day to open the heart and improve spinal mobility. Dr Shah advises that when practising movements that involve twisting, you should make sure that they are done in a slow and controlled manner without additional joint movement. This helps minimise risk of additional injury.
How to: Start lying on your mat with your arms open and extended to a T position. Bend both knees so that your feet are flat on the floor. Now lengthen your right leg beneath you. Next, lift your left leg over the right, bending at the knee to about 90 degrees. Let the weight of your left leg relax on the floor and place your right hand on the outside of your right knee if you prefer. Breathe and rest for 30 seconds, then repeat on the other side.
Pro tip: Keep your chest open to the sky and both shoulders on the mat as you twist the lower body and release through your hip, outer glutes and lower back.
4. Half Lord of the Fishes (Ardha Matsyendrasana)
The Half Lord pose is a seated spinal twist that lengthens and rotates the upper body to inspire better posture and release tension. Some yoga enthusiasts also say that the pose can help improve digestion. Make sure that you are comfortable with the supine spinal twist before practising this more advanced twisting movement.
How to: Start in a seated position with your legs extended in front of you on the mat. Now fold your right leg underneath you so that your foot comes to the outside of your left hip. Bend your left knee and place your left foot on the outside of your right knee. Place your right hand on the floor by your right hip. Exhale and twist your upper body to the right, away from your left leg. Keep your shoulders relaxed, chest open and spine lengthened. Let your gaze follow the path of the rotation. Bend your left elbow to 90 degrees and place the back of your upper arm on the inside of your left knee, letting your palm stay open. Breathe and relax into the twist for 30 seconds or as long as your body will allow. Release and repeat on the other side.
Pro tip: Use props to make this pose more accessible. Sit on a bolster or a folded blanket to open up your hip area and invite greater rotation at the base of your spine.
5. Child's Pose (Balasana)
This simple folding pose is perfect for releasing stress and relaxing the muscles in the lower back, hips and thighs.
How to: Start in a seated kneeling position with your legs folded underneath you and toes together. Exhale and let your upper body and shoulders release towards the floor with your arms extended long over your head, palms on the mat. Rest your forehead on the mat. Stay in the pose for as long as you need.
Pro tip: You can separate your knees and allow the body to relax towards the mat between your legs if keeping your knees together is not available to you. You can also allow your arms to drape onto the mat alongside your body, with your palms facing up.
More Yoga for the Lower Back
Some yoga poses can help you build a healthier back by improving mobility and increasing strength. Dr Shah says that strengthening your hip and core muscles will help improve your posture and reduce the aches you feel. But, if they are not performed correctly, they can aggravate back pain. So you should consider working with a yoga instructor or taking a yoga class when first trying these asanas to ensure proper form.
- Locust Pose (Salabhasana) is a beginning-level pose that is performed in a prone position on your mat. With your arms alongside your thighs, you lengthen the top of your head and the bottom of your toes in opposite directions. While it is not recommended for those with serious back injuries, it helps strengthen the back of your torso and the back of your legs.
- Cobra Pose (Bhujangasana) is a chest-opening asana that also begins in the prone position. But for this pose, you plant your hands beneath your shoulders and press your torso up into a cobra-like position. While it can help relieve back pain, it is essential not to over-arch the back when your chest is lifted.
- Triangle Pose (Trikonasana) is named after the shape your body makes as you lengthen and strengthen the spine. The pose begins with your feet wide, and challenges you to keep your spine long and chest open as you tilt your upper body. It's important that you bend your body to the side rather than forwards to avoid making your back pain worse. This pose also increases flexibility and strength in the hips, which can help prevent back pain.
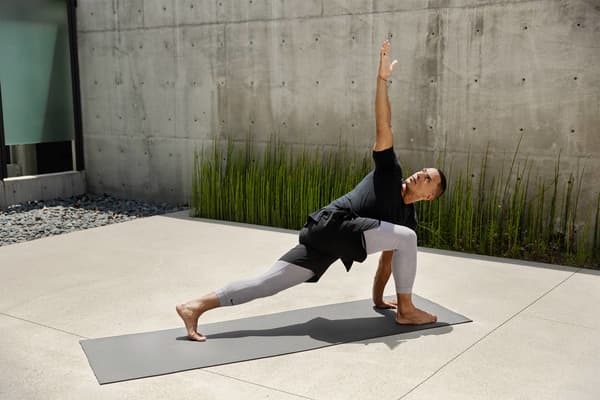
- Extended Triangle Pose (Utthita Trikonasana) takes triangle pose to a deeper level by adding a deeper reach and (for those who choose it) an upwards gaze.
Yoga Poses to Avoid When You Have Back Pain
There are a few yoga poses that you might want to avoid if you have back pain. Asanas that involve backbends can be troublesome. Camel Pose and Full Wheel, for instance, can make your back pain worse.
Any pose that increases discomfort should be avoided until your back feels better. 'In general, yoga poses are a good start for improving posture to help relieve back pain', says Dr Shah, 'but it's always important to determine the root cause for back pain'.
If back pain continues for more than a few weeks or begins to accelerate in terms of frequency or spreads to other areas of the body, he suggests that you speak to your healthcare provider. As always, listen to your body and always honour its needs first to keep it strong and healthy.
See also: Yoga Poses for Stress Relief
